
Grunge Rose
Step 1: cut out 3 - 6 petal flowers for each rose you want
to make
Step
2: colour them by misting with various glimmer mists. Repeat until they are
saturated in color.

Step 3: Dry the inked grungepaper (or cardstock) with a heat tool.
Step 3: Dry the inked grungepaper (or cardstock) with a heat tool.
Step
4: Ink the edges of the grungepaper flowers with distress ink.

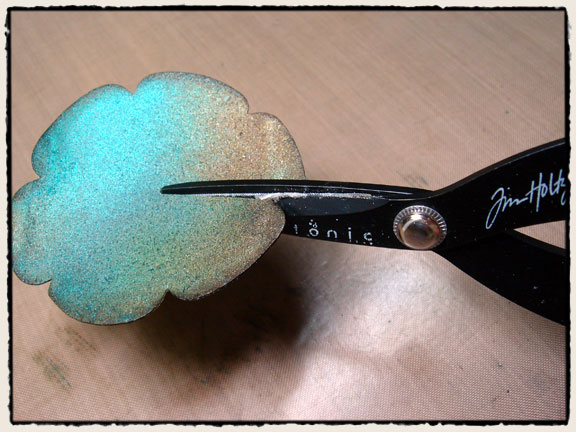
Step
5: Snip between each petal about 1/2” to help the curl later.

Step 6: Flower #1 make only one cut in between two petals to the center of
flower as shown.
Step 7: Flower #2 completely cut out one petal of the flower all the way to the
center as shown. *this will look like a piece of pie.

Step 8: Flower #3 completely cut out two petals of the flower all the way to the
center as shown. * this will look like a butterfly wing.

this is what you will end up with...

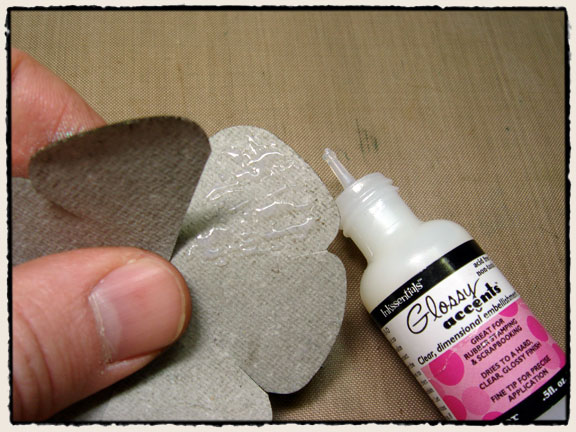
Step 9: Apply glossy accents to the back of the grungepaper on the petal to the
right of the cut line. be sure to spread it out over the entire flower petal as
shown. Wrap the flower into a cone
shape overlapping the petal on the left over the glossy accent one on the right
and line them up to adhere together as shown. Apply a paper clip to the
overlapped areas allowing the glossy accents to dry completely - this is very
important!


Step 10: Repeat above step for the other two larger flower pieces
creating three flower cones as shown.

Step 11: Ink the back of the two remaining petals with distress ink
using ink blending tool as shown.

Step 12: Curl in the two top edges of smallest petal into the center
with the main color on the outside as shown.
Step 13: Curl only the top left petal back towards the center of the
remaining petal with the main color on the outside as shown.

The tricky part: flip petal over and roll into itself creating a cone with the curled petal on the outside as shown.
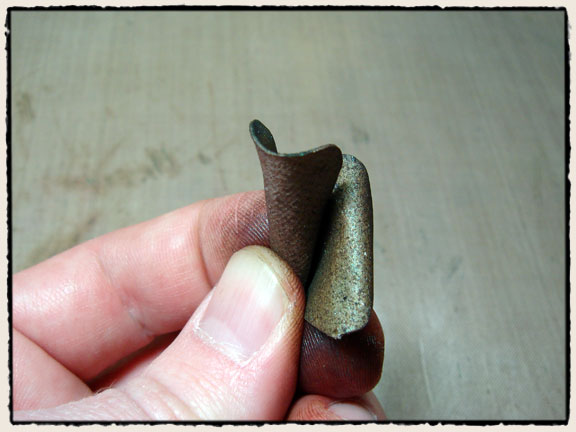
Apply glossy accents to the area of the petal where they overlap as shown.

Hold in place to dry with your fingers by pinching this area together as shown.

The tricky part: flip petal over and roll into itself creating a cone with the curled petal on the outside as shown.
Apply glossy accents to the area of the petal where they overlap as shown.
Hold in place to dry with your fingers by pinching this area together as shown.
Step 14: Snip the ends from both small petals as shown.

Step 15: Curl the petals back on the three larger flowers by rolling
them towards the center with your fingers as shown.


Step 16: Snip the ends from all three flowers as shown.

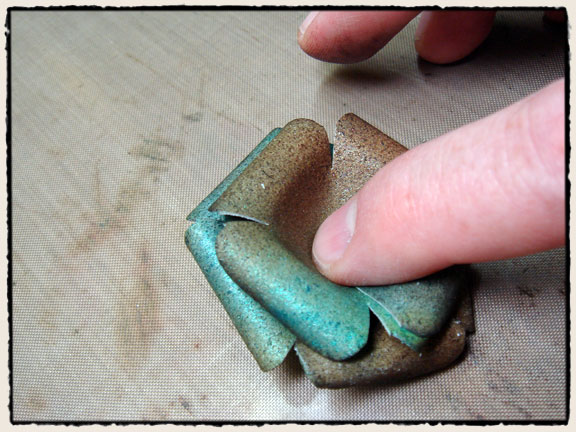
Step 17: Apply glossy accents into the center of the largest flower
and adhere next size flower by nesting it inside and hold to allow glue to set.
*i prefer to off-set the petals a bit as shown. Repeat previous steps for next
size flower as shown.

Step 18: Finish flower by adhering smallest petals inside flower
with glossy accents. position center petals as shown until desired look
is achieved. *if your rose is too tall, snip some off of the center pieces.

If you want video instructions, Tim hasn't done any himself but there are lots on you tube..just put in grunge rose.
Wow those are awesome!!!
ReplyDeleteThanks for the tutorial!